How to Create an Azure Virtual Machine
One of the most basic tasks a VMware administrator will perform is deploying a virtual machine. Whether it is creating a VM from scratch or using a template, we’ve all worked through the wizard.
As I dig deeper into Azure I can’t help but bring my experience with vSphere along with me. The Azure Resource Manger is a very different experience from the vSphere Web Client but there also quite a few similarities. I invite you to join me as I walk through the creation of an Azure Virtual machine.
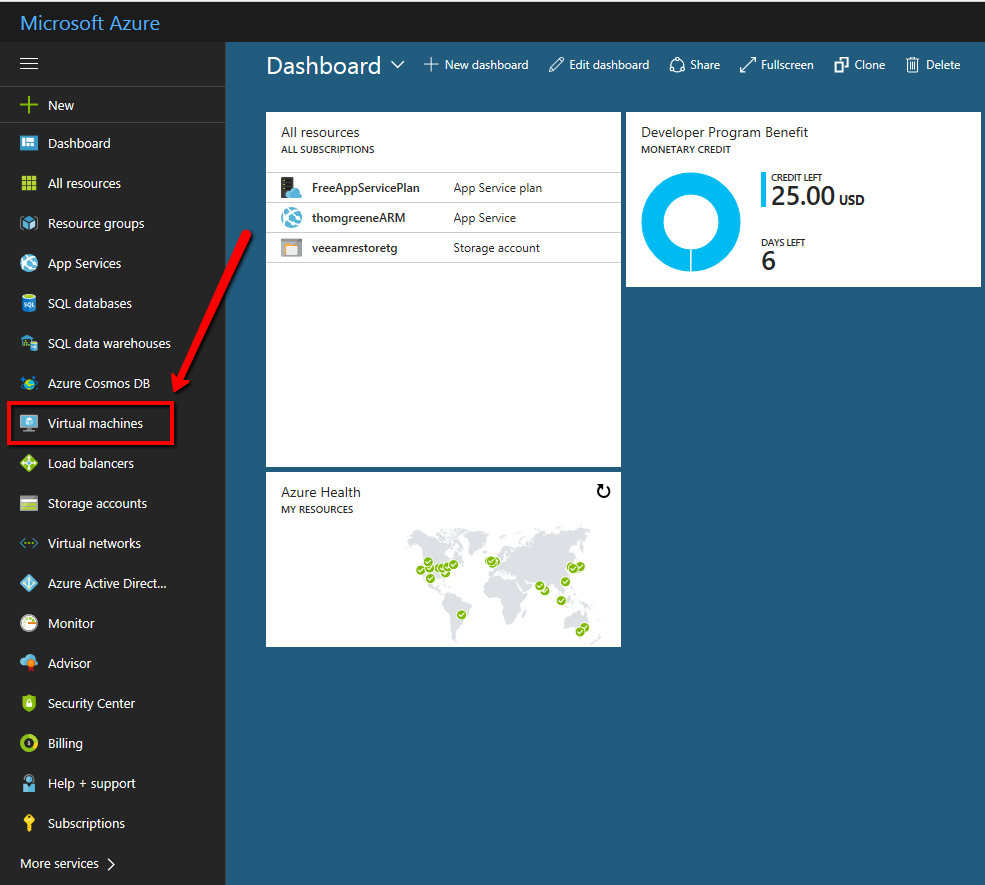
The basic deployment of an Azure Virtual Machine starts at https://portal.azure.com. This leads you to the Azure Resource Manager (aka ARM) dashboard, the launching pad for all of Microsoft’s ARM services. Once you’re logged in, click on Virtual Machines in the left navigation blade.
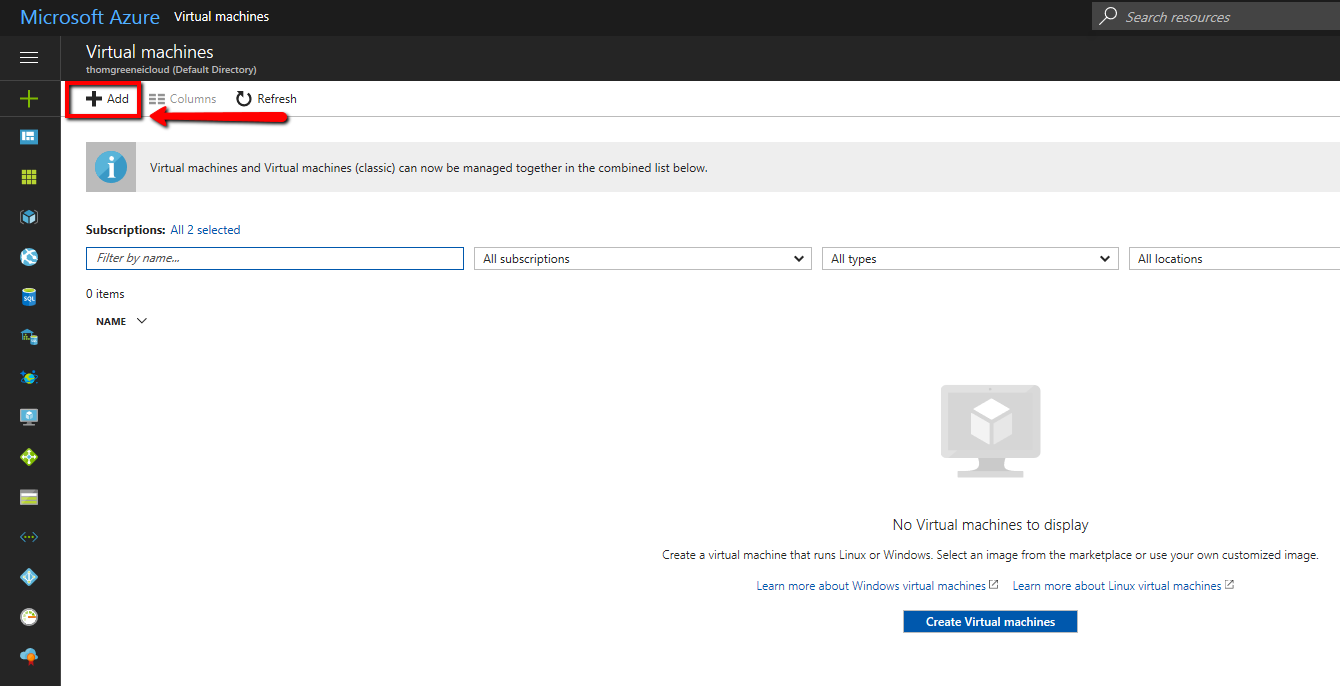
After you click into the Virtual Machine service, click the Add button to add a new Virtual Machine.
This opens the Azure virtual machine creation wizard. The navigation system is called a blade. These blades take you through the process of creating the virtual machine.
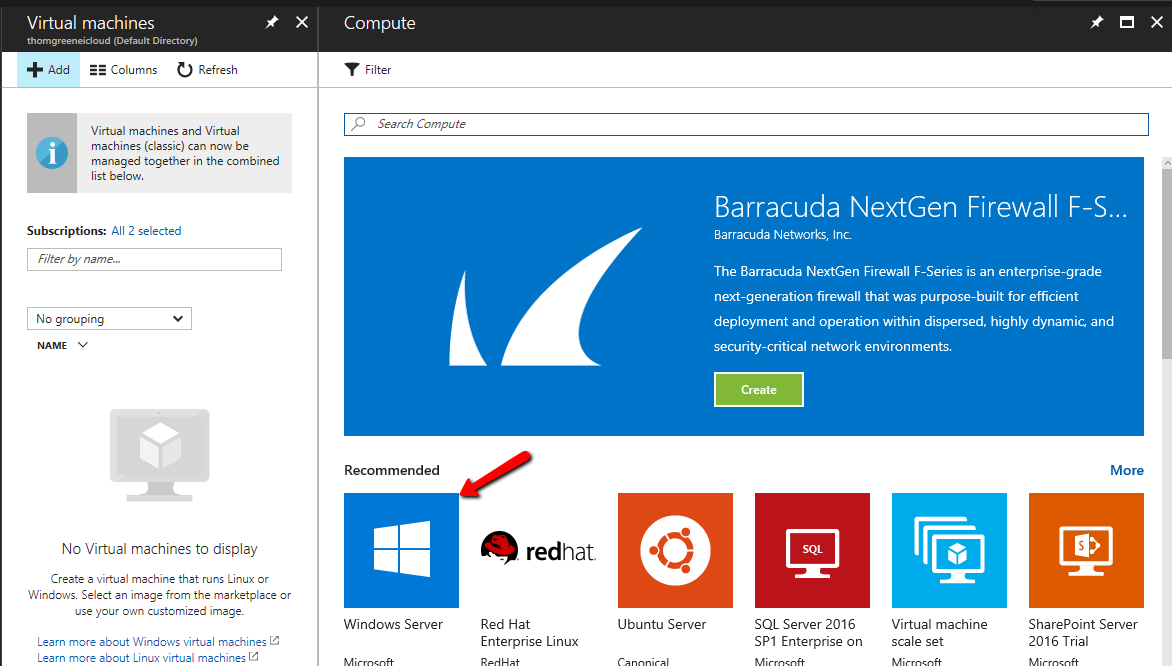
the first blade that opens is the Azure Marketplace. You can choose an operating system or a partner created image here. You can think of this as you vSphere content library or folder of templates.
To continue through this tutorial click Windows Server
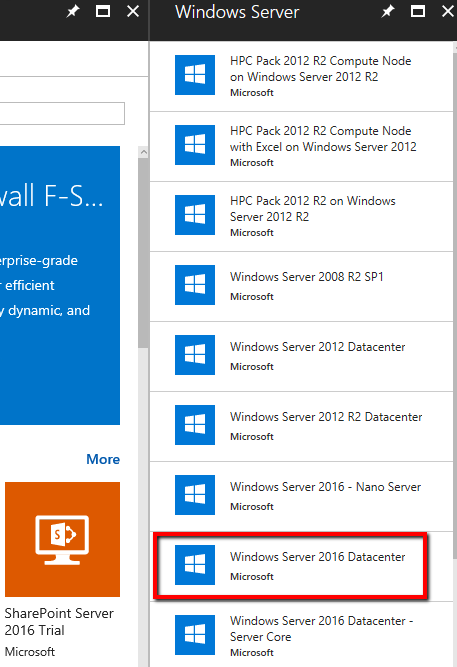
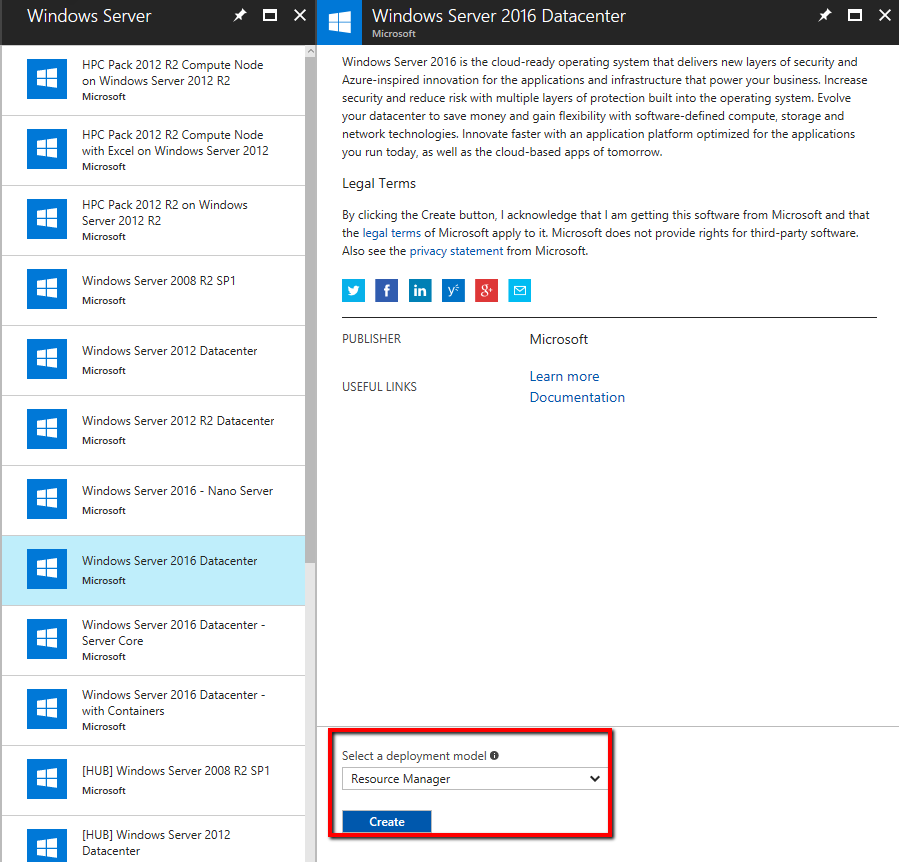
Another blade opens. This blade gives you many options for the version of Windows Server available to deploy. Choose Windows Server 2016 Datacenter
After choosing the operating system version you choose a deployment model. There are two deployment models: Resource Manager and Classic. There are many differences between the two models, though I’ll keep it brief in the interest of time. Basically, Resource Manager allows for grouping resources with the same lifecycle with Resource Groups. You can delete, delegate access with Role Based Access Control, and separate your bill via Resource group.
Azure is encouraging everyone to use Resource Manager so we will choose that.
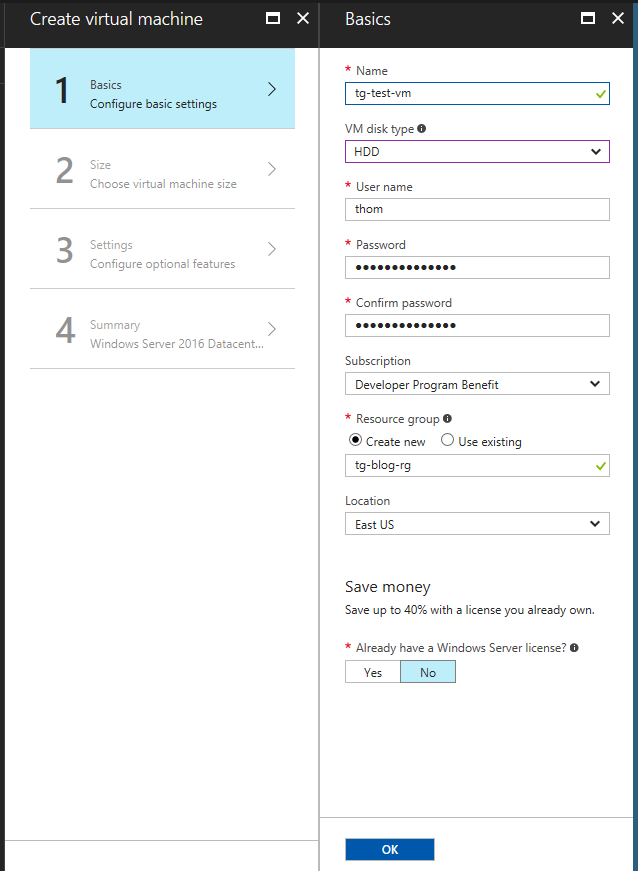
Now it’s time to start creating our virtual machine. The first blade we encounter allows us to set the basic details of our machine. I will set up this machine as if I had a brand new account with nothing created aside from the subscription. Check out my Azure resources post if you still need to set up a subscription. You can redeem the free trial or the Visual Studio Essentials credit mentioned in that article.
In this example I choose HDD as my VM disk type. You can also choose SSD but this affects your options for VM sizing and price.
I chose to create a new resource group for this example. If this VM was part of a bigger project or application We could choose an existing resource group.
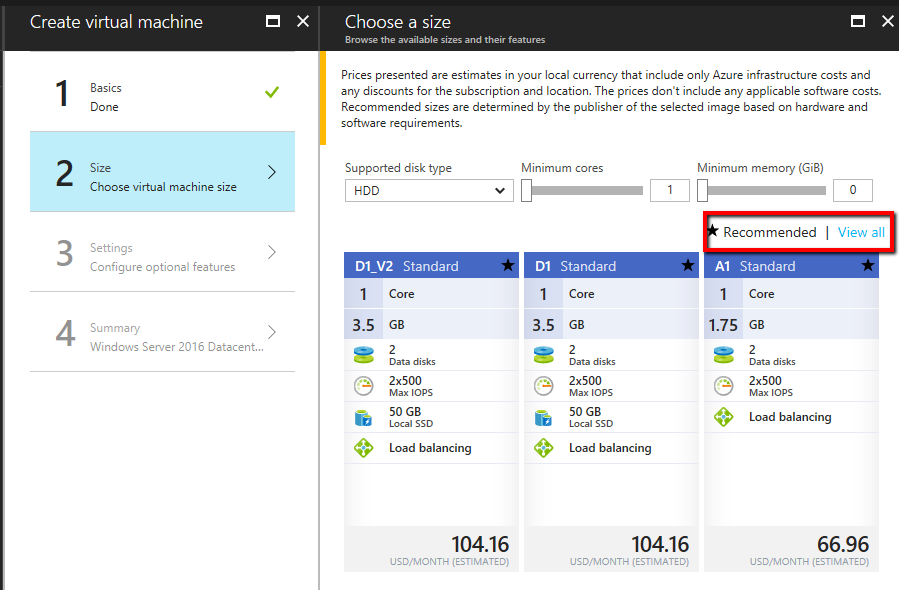
After hitting OK another blade opens. This blade allows you to choose a size for the virtual machine. If you’re a VMware administrator new to cloud, this will be an odd concept. When I make a VM in vSphere I can add any combination of cores and RAM. In Azure you must choose from a number of predetermined VM sizes. Not only do these sizes impact CPU and RAM but also the maximum number of extra data disks that can be attached.
When the blade loads it only shows you three Recommended VM sizes. If the price and configuration of these machines are acceptable, feel free to click one. I felt it was very expensive so I clicked View All.
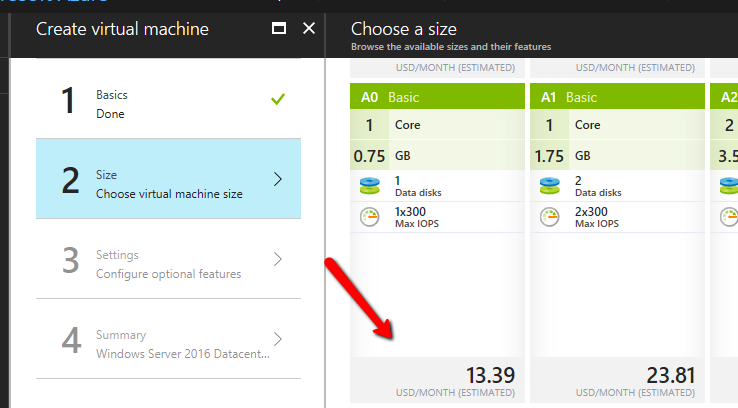
The full list of possible virtual machine sizes will populate. Some may be unavailable due to restrictions on your subscription. For example, there is a limit of 4 total cpu on my subscription so I couldn’t deploy a 6 CPU machine,
Scroll through the list and choose a A0 Basic machine size. This will be fine for our example.
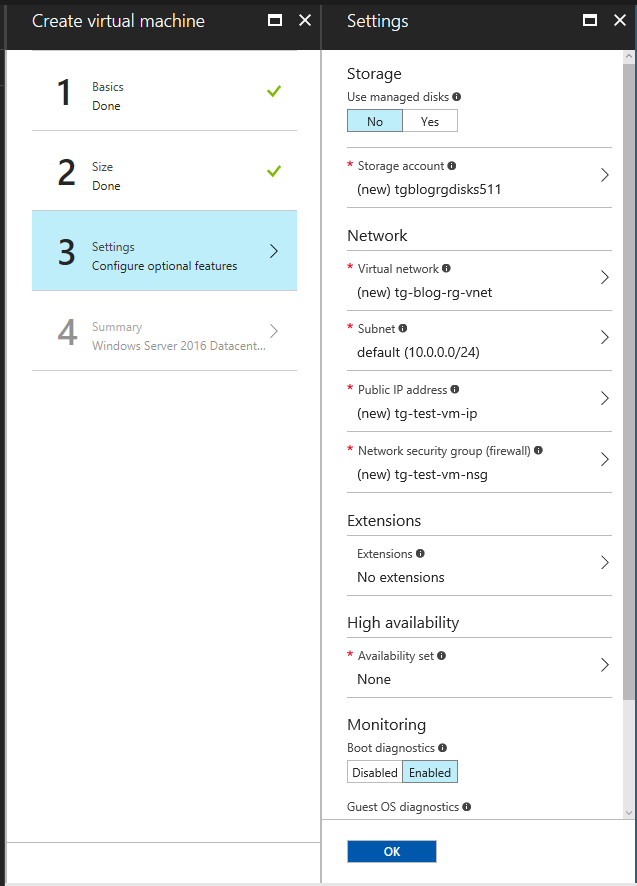
Making that choice opens another blade for optional features. There is a lot to unpack on this blade:
Storage account: In vSphere datastores are configured on the host. When you deploy a VM you choose a datastore or datastore cluster. The performance and resilience are configured at the SAN. In Azure you must create a storage account to store your VMs.
A storage account allows you to configure performance, encryption at rest, and redundancy on the account. After configuring this account you choose it from a drop down and it just works.
Virtual Network: in vSphere networking is configured with vSwitches or distributed vSwitches. Unless you’re using NSX you have little control of security or routing beyond that.
An Azure virtual network allows you to carve out subnets, create routes, and secure endpoints. Each of the Virtual network, subnet, public IP, and security group can be customized here or chosen from an existing set.
Extensions allow you to customize your virtual machine with programs from the Azure Marketplace. You can install antivirus agents, the Powershell desired state configuration agent, or the Puppet agent, for example.
High Availability in the cloud is very different than in a vSphere datacenter. So long as storage is shared between hosts in the cluster, a check box will allow a virtual machine to power on in seconds if a host crashes.
In Azure this isn’t the case. If you only deploy one virtual machine there is no guarantee of availability. In order to achieve a 99.9 uptime you must deploy at least two virtual machines.
You have the option to create an availability set. This will let you deploy multiple identical copies of the virtual machine and assure that there will be at least one copy available 99.9% of the time.
Just leave the defaults and click OK to move on.
The summary blade displays everything we configured. At the bottom of the page is an interesting link: Download template and parameters. Click it.
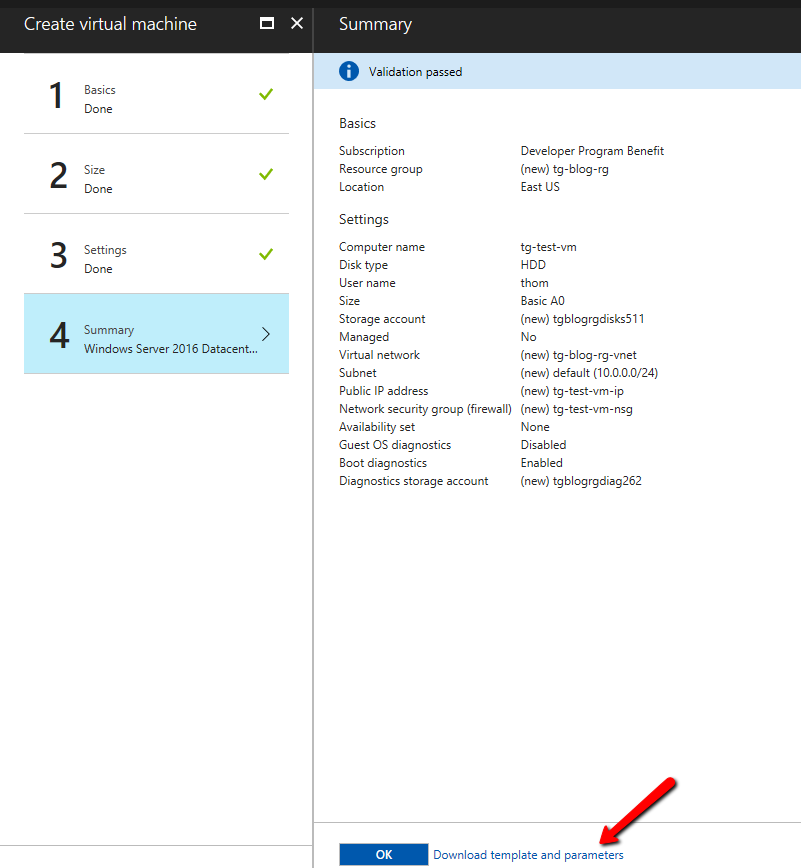
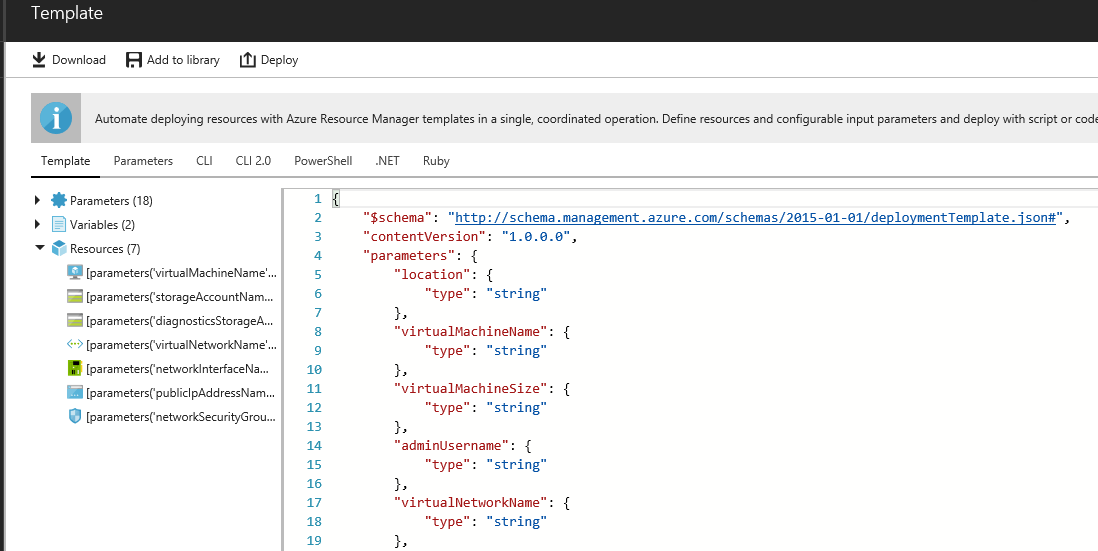
There were quite a few clicks to go through just to deploy one VM. Azure provides us a very easy way to download a template to recreate this machine, just by clicking this link. A new blade opens and gives you the option to add the template to a library or to download the script and run it yourself. The best part is that you can customize the template and use it to deploy other virtual machines in the future.
Press the X in the top right of the template blade to return to the summary, then click OK.
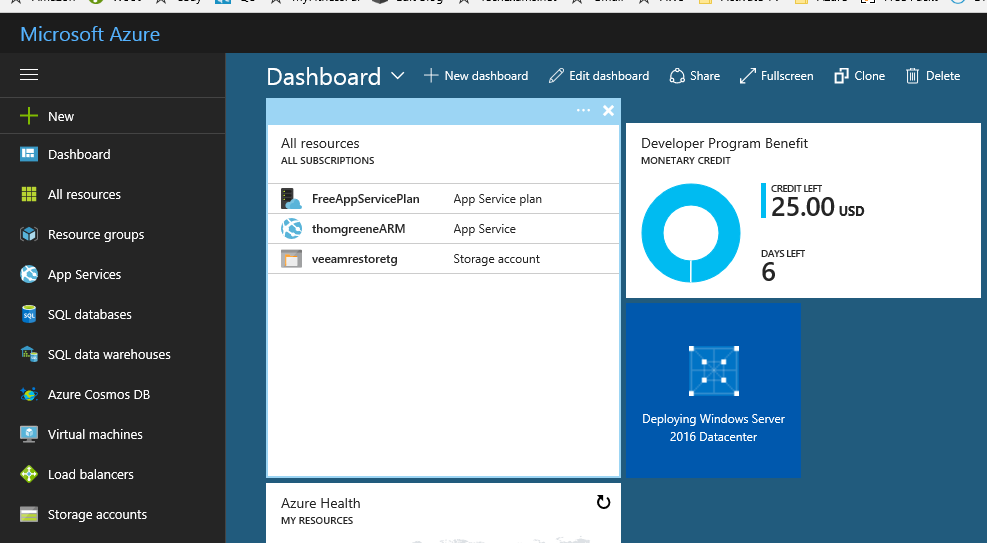
We are finally deploying our first Azure virtual machine. When you deploy a virtual machine it will create a widget on your dashboard. Once the machine has deployed you can click there to open the blade with the virtual machine connection and management information.
There are many new concepts to learn as you extend VMware knowledge into Azure. Hopefully this helps clear up some of the basics of Azure Virtual Machines as they compare to vSphere virtual machines.