How to Create an Azure Storage Account
In my article about creating an Azure virtual machine, I walked us through the very basic wizard to create a VM. There is an entire segment of the virtual machine build process dedicated to optional features. These features allow new virtual machines to integrate a VM into an existing Azure environment. When we created our first machine we accepted the default settings, which created new network and storage accounts. That works perfectly for a first look but it wouldn’t be appropriate for use in a real life Azure Infrastructure. To flesh out our skills we need to dig deeper into these optional features.
The first setting I want to investigate is the Azure storage account. There are so many settings and details about Azure Storage you could fill an entire book. In order to focus, I will only look at the process and choices you’ll make creating your first storage account. As the series progresses I’ll dig deeper into the management and advanced configuration of a storage account. The concept of an Azure Storage account isn’t too far removed from the idea of a SAN or NAS datastore in VMware but there are some differences. An Azure storage account is a scalable, high performance storage solution that allows storage of virtual machine hard disks, files, tables, queues, and so on. The capacity can grow as needed and the account can provide local or global redundancy depending on the need.
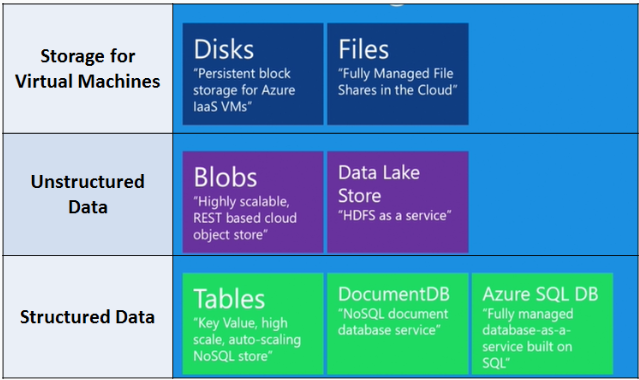
OpenEDX provides a great table explaining the types of data which can be stored in Azure Storage accounts. This is useful information to keep in mind as we go through the process.
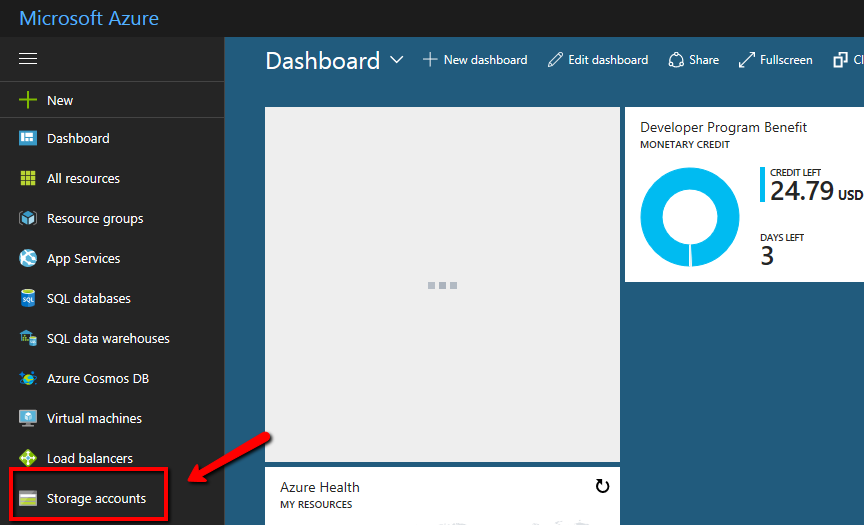
We start on the Dashboard at https://portal.azure.com. In the left navigation blade choose Storage Accounts.
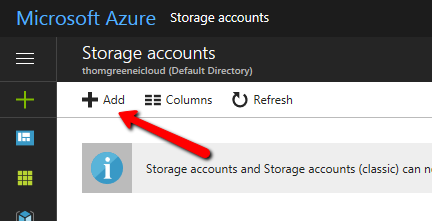
This brings up the Storage accounts summary screen. All created storages accounts can be managed from here. To continue click Add
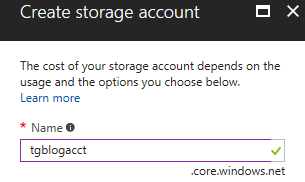
There is a lot to talk about in the Create storage account blade, so I am going to break it into chunks. First you must name your storage account. The name is required to be globally unique. This means that it can’t share a name with any other storage account in existence.
Next, we choose an account type. There are two types of storage accounts: General purpose and Blob. A general purpose storage account allows you to store virtual machine disks, files, tables, and blobs within the same account. A Blob storage account allows you to store any type of document or binary files in an unstructured object store. This data can be made available on the Internet via HTTP or HTTPS. The concept of an object store doesn’t exactly line up with any VMware product but you can think of it in the context of Amazon’s S3 service, OneDrive or Dropbox. The first choice we’ll make in the Account kind drop down is General purpose. Afterward we will choose Blob and compare our options.
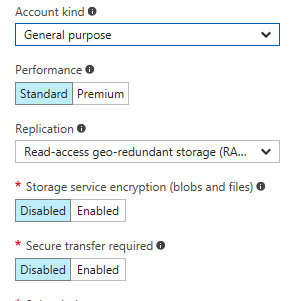
The first choice you make for the general purpose storage account is which performance tier you prefer. Your two choices are Standard or Premium.
- Standard Performance Tier uses magnetic HDDs as the back-end storage for the account. If you choose the standard tier you can store all support types of data in the same account.
- Premium Performance Tier uses SSDs as the storage backing. Azure virtual machine disks are the only type of data compatible with the premium tier
Next, we will talk about Blob storage. Change the Account kind drop down to Blob and let’s look at what changes.
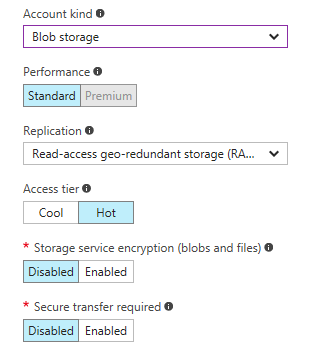
First, you will notice that Standard is the only performance tier option available. As I mentioned earlier, Premium performance is only available for Azure virtual machine disks. Second, there is a new option: Access tier. The two choices for the access tier are Hot and Cool. To understand the difference, it is important to know that you are charged a fee to store the data in your account and you are charged a fee every time the data is accessed.
- Hot Access Tier - The hot access tier is intended for data that will be accessed often. It stays on faster disks and is ready to be consumed at peak performance with lower access fees.
- Cool Access Tier - The cool access tier is intended for data that needs to be retained in a resilient manner but is infrequently accessed. You pay a lower storage fee but pay more for access when the data needs to be retrieved.
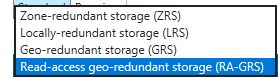
The same replication options exist on both general purpose and Blob storage accounts. Microsoft always maintains at least three copies of your data to guarantee availability during datacenter failures or system updates. If you click the drop down there are 4 options:
- Locally Redundant Storage (LRS) - LRS maintains three copies of your data replicated in a single datacenter.
- Zone-Redundant Storage (ZRS) - ZRS maintains three copies of the data across two or three datacenters within the same region
- Geo-Redundant Storage (GRS) - GRS maintains six copies of the data: three copies are replicated across datacenters in your primary region and three copies replicate to a different region hundreds of miles away
- Read Access Geo-Redundant Storage (RA-GRS) - RA-GRS also maintains six copies of the data across two regions, however these are read access copies. This means in the event of a failure they could be used in a read only fashion until they replicate back to the primary datacenter.
The replication decision comes down to cost and desired availability. Azure’s default choice is RA-GRS; The most expensive but also the most versatile. One advantage of this replication method is reporting servers could access the read-only copies of data without impacting performance on the read/write primary copy. At this point I went back up and made sure I had a general purpose storage account using standard tier storage and RA-GRS replication. This provides a lot of options in the future. If your use case was to run virtual machines in production, perhaps a general purpose premium tier account would be the best choice for you.
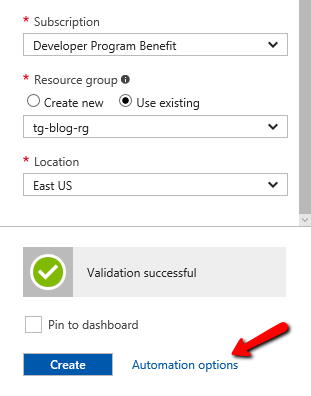
As we reach the bottom of the Storage account creation blade we are again prompted to create or choose a resource group. In the virtual machine creation article, we created a new resource group. I want to use that group for everything related to the Azure series I am writing so I chose to Use existing and selected it from the drop down. It is also interesting to note that there is a link for Automation options at the bottom of this blade as well. If you click it you can download a script which would create this storage account. This is a wonderful way to start learning Azure CLI or Azure PowerShell. We now have a custom general purpose storage account to use for blob, VM disks, or any other options Azure storage can support.